Dig It–Not! The No-Dig Gardening Method
01 Jul 2016
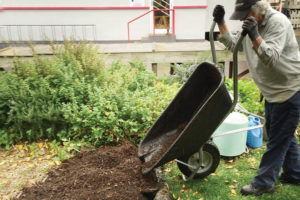
Want a garden without the backbreaking task of digging? Try this method.
By Lisa Truesdale About 40 years ago, an Australian gardener named Esther Deans became fairly well known for her rather unique lasagna recipe. But her recipe didn’t have anything to do with Italian cuisine—it outlined the steps for creating a no-dig garden, which is basically an above-ground garden plot that’s composed of several different organic layers. This technique is sometimes referred to as “lasagna gardening” because, over time, the layers break down into a nutrient-rich soil—much the way actual lasagna is often tastier after the flavors of noodles, cheese and sauce have had a chance to blend together.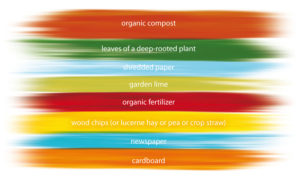 Although others had previously advocated the technique—like Masanobu Fukuoka, a Japanese farmer who popularized his concept called “do-nothing farming” in the 1930s—Deans is credited with promoting the concept widely throughout Australia and New Zealand. No-dig gardening is similar to what we call “sheet mulching” in the U.S., and gardening experts say the technique gave rise to the permaculture movement, which advocates farming and gardening principles that simulate the patterns and features of nature.
“With this type of gardening,” says Jeanette Spooner, a garden technician at Otago Polytechnic’s Living Campus in Dunedin, New Zealand, “you’re simply looking at what nature does, then copying it and speeding it up.”
No-dig gardening offers so many benefits that Spooner wonders why more people don’t try it. In fact, she says, turning the soil while digging can disturb the microorganisms and also cause erosion, so it’s best to use the no-dig method whenever possible. With the no-dig method, there’s no backbreaking digging or rock removal to be done, which is especially helpful for children, older gardeners and those with disabilities. It saves time and money, because you don’t have to pay to get the soil tested, experiment with different soil amendments, or endure costly trial and error.
It’s also better for the environment, says Morgan Vondrak, a landscape designer based in California. “People often ask why they shouldn’t just remove the lawn instead. But once the sod is removed, it has to be transported to a waste facility, where it ends up as trash if it isn’t converted into compost.”
And, Vondrak adds, sheet mulching reduces weeds and produces healthier plants. “Healthy, nutrient-rich soils are able to absorb and hold more water, and they reduce the need for fertilizers.”
Vondrak and Spooner agree on the one instance when the no-dig method should not be used: when planting near a tree or other established shrub.
Although others had previously advocated the technique—like Masanobu Fukuoka, a Japanese farmer who popularized his concept called “do-nothing farming” in the 1930s—Deans is credited with promoting the concept widely throughout Australia and New Zealand. No-dig gardening is similar to what we call “sheet mulching” in the U.S., and gardening experts say the technique gave rise to the permaculture movement, which advocates farming and gardening principles that simulate the patterns and features of nature.
“With this type of gardening,” says Jeanette Spooner, a garden technician at Otago Polytechnic’s Living Campus in Dunedin, New Zealand, “you’re simply looking at what nature does, then copying it and speeding it up.”
No-dig gardening offers so many benefits that Spooner wonders why more people don’t try it. In fact, she says, turning the soil while digging can disturb the microorganisms and also cause erosion, so it’s best to use the no-dig method whenever possible. With the no-dig method, there’s no backbreaking digging or rock removal to be done, which is especially helpful for children, older gardeners and those with disabilities. It saves time and money, because you don’t have to pay to get the soil tested, experiment with different soil amendments, or endure costly trial and error.
It’s also better for the environment, says Morgan Vondrak, a landscape designer based in California. “People often ask why they shouldn’t just remove the lawn instead. But once the sod is removed, it has to be transported to a waste facility, where it ends up as trash if it isn’t converted into compost.”
And, Vondrak adds, sheet mulching reduces weeds and produces healthier plants. “Healthy, nutrient-rich soils are able to absorb and hold more water, and they reduce the need for fertilizers.”
Vondrak and Spooner agree on the one instance when the no-dig method should not be used: when planting near a tree or other established shrub.
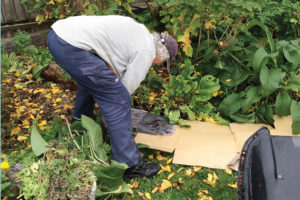
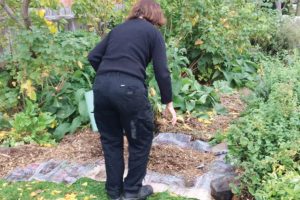
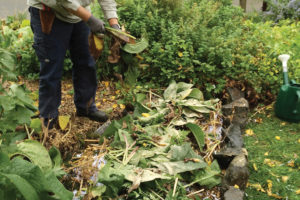
“I advise staying at least three feet away,” Vondrak explains. “There are two reasons for this. One, you never want to place any type of mulch directly up to the trunk of a tree or the crown of other plants, because this will block air flow and can cause disease. Two, as the organic material breaks down, it builds up the soil level, and that will cause your existing plants to end up in a hole.” Spooner and her colleague, Paula Griannah, recently demonstrated the construction of a 3-by-8-foot no-dig garden on the campus of Otago Polytechnic, and we’ve outlined the easy steps for you on the opposite page. The selected plot needs to be outlined with rocks, bricks or other similar materials that will contain the soil; this step can be done first, although Spooner and Griannah placed rocks around their no-dig garden after a few layers, so that they could position the rocks on the very edge of the cardboard to discourage weeds. A note of caution: Do not use any ingredients that have been chemically treated, especially if you’re planning to grow food.Tip
Do not use any ingredients that have been chemically treated, especially if you’re planning to grow food.
Step 1
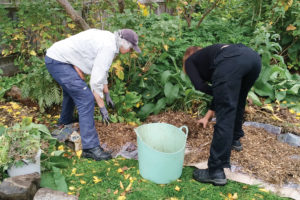
Step 2

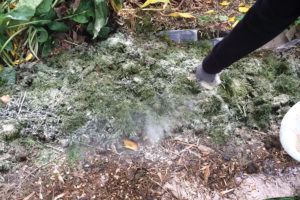
Step 3
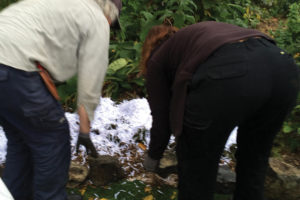
Step 4
Step 5
Step 6
Step 7
Step 8