Spring-Cleaning Musts
03 Apr 2015
We all put a few spring-cleaning chores into the “out of sight, out of mind” category, but some tasks are vital to a healthy household.
Here are ones we often overlook.
By Rebecca Schneider Spring is the time to tackle all the chores we’ve turned a blind eye to all winter. But some items we overlook can elevate a house from tidy to sparkling, and improve our home’s health in the process. Here are some must-do tasks to tackle in spring.Pillow Pleasures
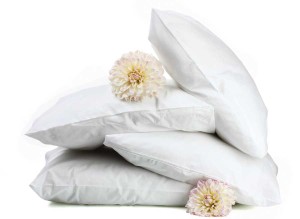 Washing pillowcases on a regular basis is a no-brainer. But pillowcases only provide a small level of protection when keeping dust and germs out of the pillows themselves. Always check the laundering tag before washing pillows, because some materials like foam can’t go in the washing machine.
Put washed pillows in the dryer with a couple of clean tennis balls to keep them in peak shape. (The balls are a bit noisy, so dry pillows when you’re running errands.) Ideally, you should run a dryer load of pillows on a no-heat, air-only setting each month.
Tip: Buy an allergen-blocking pillow protector that fits between the pillow and the case to add extra protection between you and potential invaders.
Mattress Makeover
 Now that your pillows are in tip-top shape, it’s time to tend to your mattress. The same principle applies, in that a sheet only provides so much protection from germs and allergens. The good news is cleaning a mattress is much easier than flipping it.
Remember that upholstery vacuum attachment you probably store on a shelf? Well, it’s time to dig it out and use it. When the bed is stripped, vacuum the mattress with the attachment. Then evenly sprinkle about a cup of baking soda over the mattress using a flour sifter. Let the powder sit for approximately an hour, then use the attachment to vacuum it up. This not only deters pests like dust mites, it makes your mattress smell fresher. Perform this chore seasonally.
Tip: Mix a few drops of 100-percent pure essential oil (lavender is a good choice) into the baking soda to add a refreshing scent.
Clean Crannies
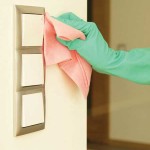
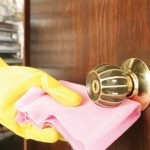 Some of the most overlooked hideouts for dirt, grime and germs are doorknobs and light switches. These items should be cleaned on a weekly basis. A little spritz of vinegar and a rag are all you need to get the job done correctly. Spray the vinegar directly onto knobs and switches throughout your home. After you’ve done this, go around and spray again, but this time wipe the items with a rag. Spritzing a second time ensures germs are kicked to the curb, and letting the disinfectant sit for a few minutes allows it to work more effectively.
Tip: If you don’t like the smell of vinegar, try Seventh Generation Disinfecting Multi-Surface Cleaner. It kills 99.99 percent of typical household germs using botanicals instead of chemicals.
It’s OK to Vent
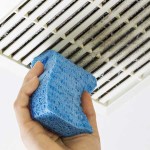
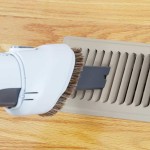 Cleaning air and heat vents is an important task. Vents are magnets for dust and dirt that blow into the house, preventing exhaust fans from working properly and diminishing indoor air quality. Every few months (or more frequently, if you run the AC or heat for long periods), get on a stepladder and wipe down the ceiling vents. Then wipe all the floor vents.
For narrow vent slats, use a butter knife covered with a cleaning cloth to effectively clean between each slat. It’s also a good idea to remove vent covers and soak them in hot, soapy water before scrubbing them clean. Let the vents air dry, then screw them back into place. Use a vacuum brush attachment to maintain vents between cleanings.
Tip: To slow dust accumulation, apply a thin layer of car wax to the vents and buff it off.
White Walls
 Walls and doors are often-overlooked dirt magnets. Yes, they’re not the most exciting things to clean, but while they don’t rank high on the instant--gratification scale, they’re a necessity nonetheless.
Just as dust and dirt accumulate on floors and baseboard, they also build up on walls—making them look dingier than they are and also degrading indoor air quality. To stave off allergens and keep paint in prime shape, take a long-handled mop, dampen it slightly and run it down the wall, making sure to rinse and wring the mop frequently (bonus points if you wipe the wall dry).
You’ll need to be a bit more meticulous with doors that have panels, insets and other intricacies. But a quick wipe with a damp rag should send dust packing. For crown molding, place a damp rag (microfiber works well here) over a broom and secure it with a rubber band. Now you can quickly dust high corners without the need for a ladder; just be sure to vacuum the floors afterward.
Tip: To quickly remove scuff marks, rub a slightly damp Magic Eraser over the marks.
Dishwasher To-do’s
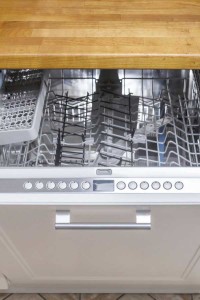 Many of us mistakenly believe that appliances designed to clean, like dishwashers, don’t need cleaning themselves. But dishwashers build up grit, grease and debris over time. If you consider how many sticky food particles pass through them each wash, it’s no wonder dishes come out less than sparkling after a while. Couple this with the fact that all those filters, holes and drains are prime breeding grounds for bacteria (not to mention clogs), and you’ll consider cleaning the dishwasher regularly.
First, remove the drawers (and give them a bath, if you’d like) to check for debris in the dishwasher bottom. Food particles, labels and stickers are all common offenders. Then use an old toothbrush to scrub the sites where the water drains.
Next, consult your dishwasher manual to locate and properly remove the following parts to clean. With the drawers out of the machine, remove and clean the filter at the bottom of the dishwasher. Then remove the spinning arms and clean the water holes with a toothpick. Next, remove and clean the steam vent on the door. Lastly, replace all the parts you’ve cleaned and put 2 cups of vinegar in the the bottom of the dishwasher, and run it without any dishes inside.
Tip: To keep grime from accumulating, run an empty dishwasher with 2 cups vinegar in the bottom on a monthly basis. This also prolongs dishware sparkle.


